Peach Pie with Canned Peaches
A few simple shortcuts make baking up a homemade peach pie easy and quick! Give this recipe for Peach Pie with Canned Peaches a try for the perfect summer dessert!
This Peach Pie with Canned Peaches uses a few quick shortcuts to make a dish that tastes like restaurant quality without expert-level effort. Like a good No-Bake Lemon Cheesecake, Peanut Butter Pretzel Pie or Peach Cobbler with Cake Mix, this peach pie is an excellent choice for a summer dessert!
Now, even though it is peach season (ahem, you should also make this Peach Pizza), this peach pie does not require perfectly-ripe and in-season peaches. Using canned peaches saves you from all that trouble and trust me–you cannot tell the difference.
Pair those canned peaches with a store-bought pie crust and you’ve got a recipe that comes together quickly and still wows a crowd (just like this 3 Ingredient Blueberry Cobbler or this Kool Aid Pie). So grab a couple cans of your favorite peaches and let’s get started!
Why Make This Recipe
- Simple Ingredients: A good fresh peach is a beautiful thing, but peaches are one of those fruits that are here one moment and gone the next. Canned peaches are perfectly sweetened and preserved at the peak of freshness and make it possible to make this peach pie any time!
- Nostalgia: Who doesn’t love a slice of peach pie? A flaky crust with all the warmth of spiced peaches is irresistible!
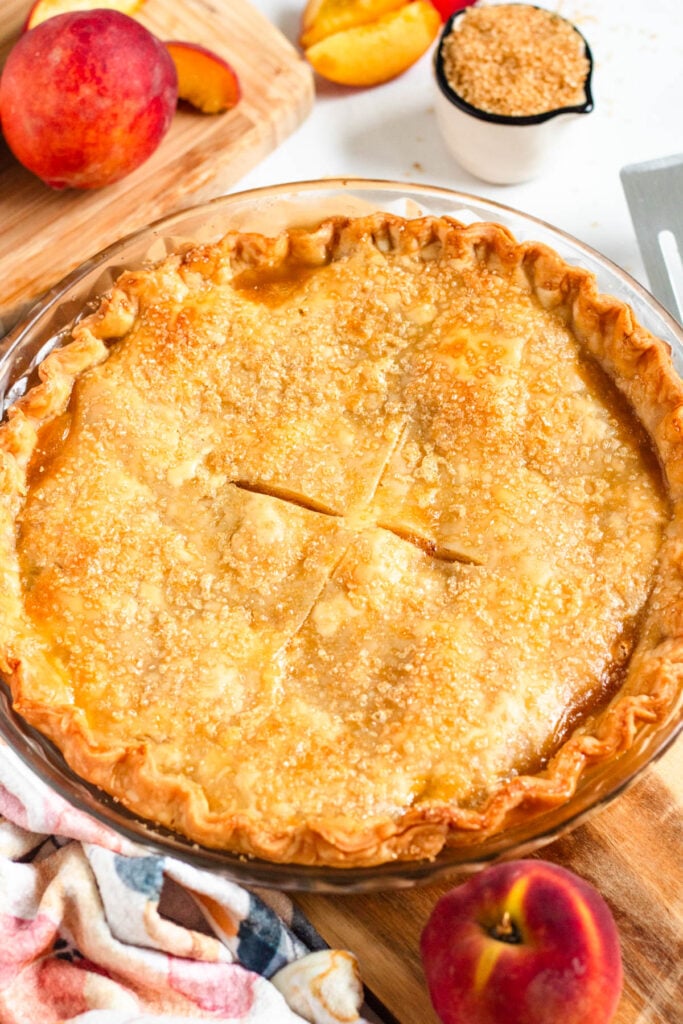
- Easy Prep: This pie looks professional, especially with the slitted and sugared crust, but a couple shortcuts make it so easy to make!
Key Ingredients to Make Peach Pie with Canned Peaches
Here is a visual overview of the ingredients in the recipe. Scroll down to the recipe at the bottom for quantities.
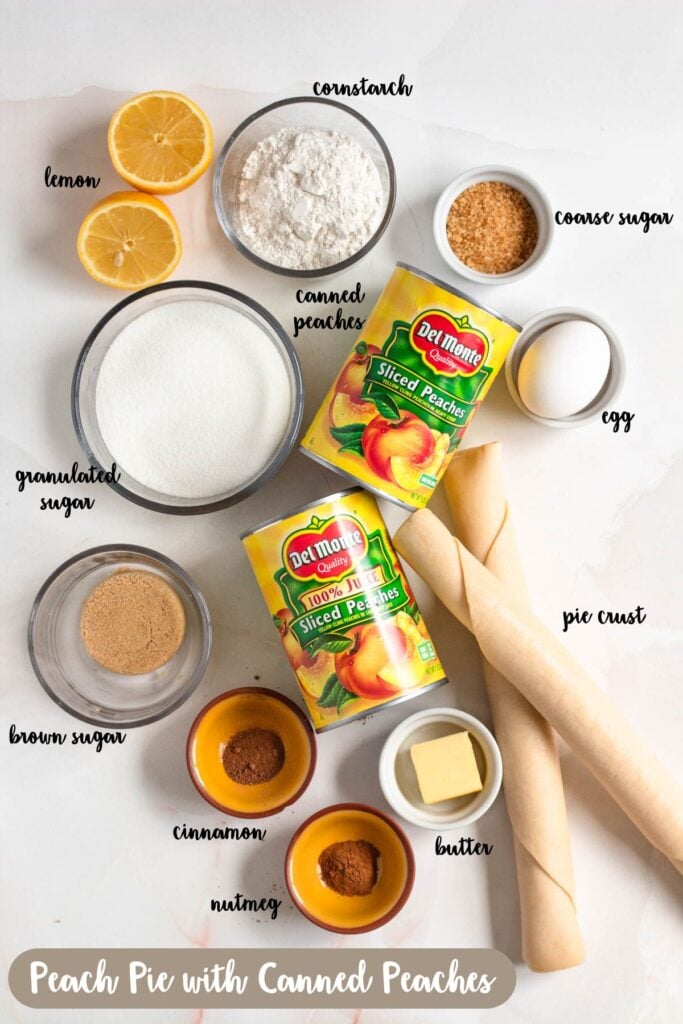
- Two Cans of Peaches: Any brand of sliced peaches works fine. Be sure and drain very well before using. I placed my peaches in a colander and let them drain for about 20 minutes just to make sure the liquid was really gone.
- Cornstarch: I first tried this recipe with flour but found that my filling turned out too runny. The cornstarch works much better!
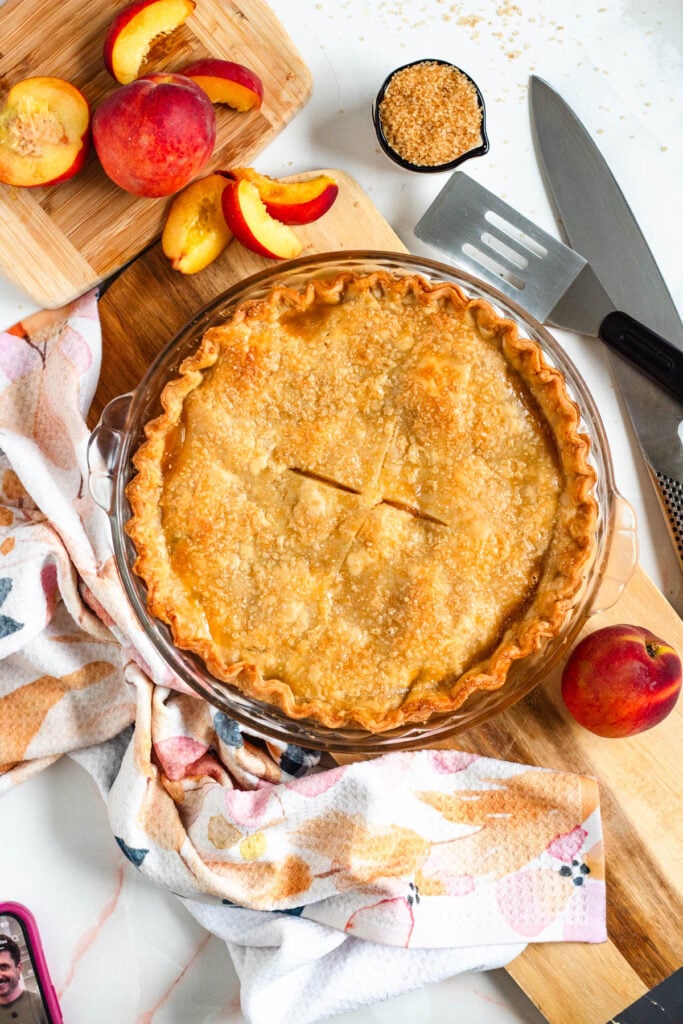
- Double pie crust: You can use a premade crust or make your own! You can also lattice the top crust, cut slits or even cut out fun shapes! A lattice crust is usually used in fruit pie recipes to allow any extra moisture to escape. Using the premade pie crust with slits is definitely the least time-intensive option, still allows moisture to escape, and turns out equally beautiful.
- Turbinado Sugar: A sprinkle of coarse sugar makes your crust look professional! It’s not a requirement for the pie to bake correctly, but it certainly does add a touch of elegance. The larger sugar crystals don’t dissolve while baking, which gives the crust a tiny bit of much-needed crunch!
Tools
- Pie Dish: You can use an 8-inch or 9-inch pie pan for this recipe. I prefer a glass pie pan as you can check the bottom to make sure that the bottom crust is cooked properly.
How to Make This Recipe
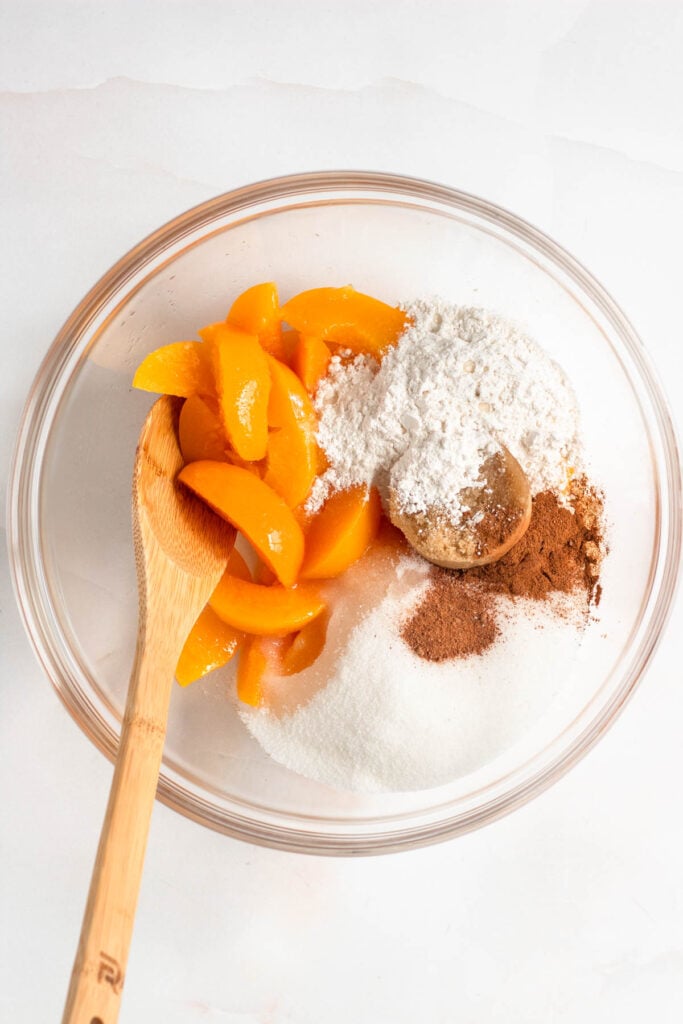
Step One: Mix the drained peaches, granulated sugar, brown sugar, cornstarch, cinnamon, nutmeg, and lemon juice.
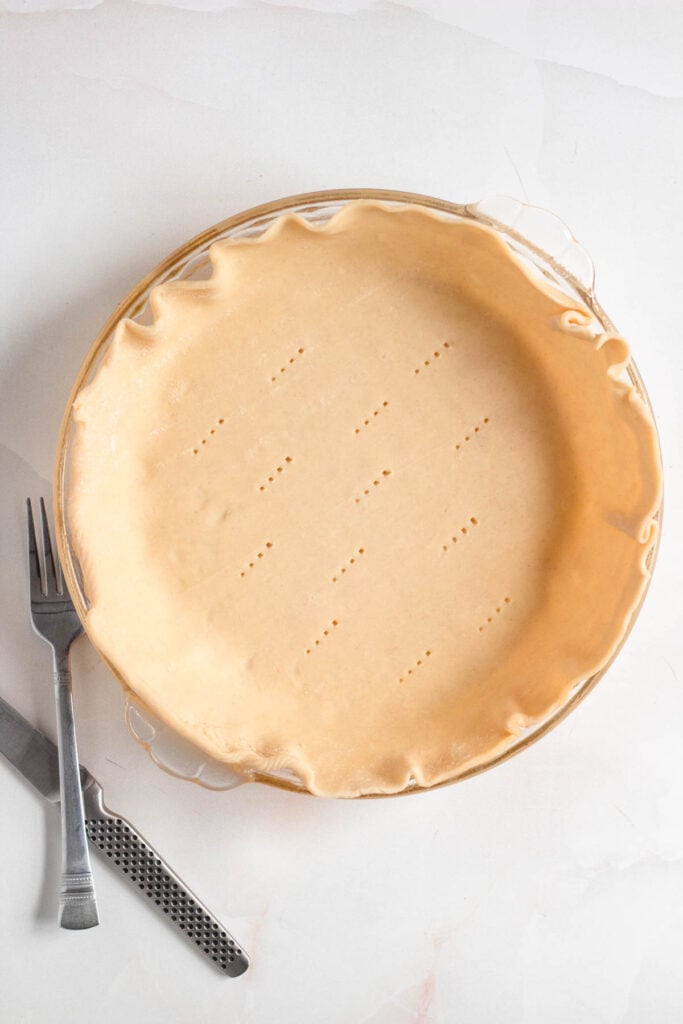
Step Two: Roll out one pie crust in the bottom of the pie dish. Poke the crust with a fork to allow for some aeration.
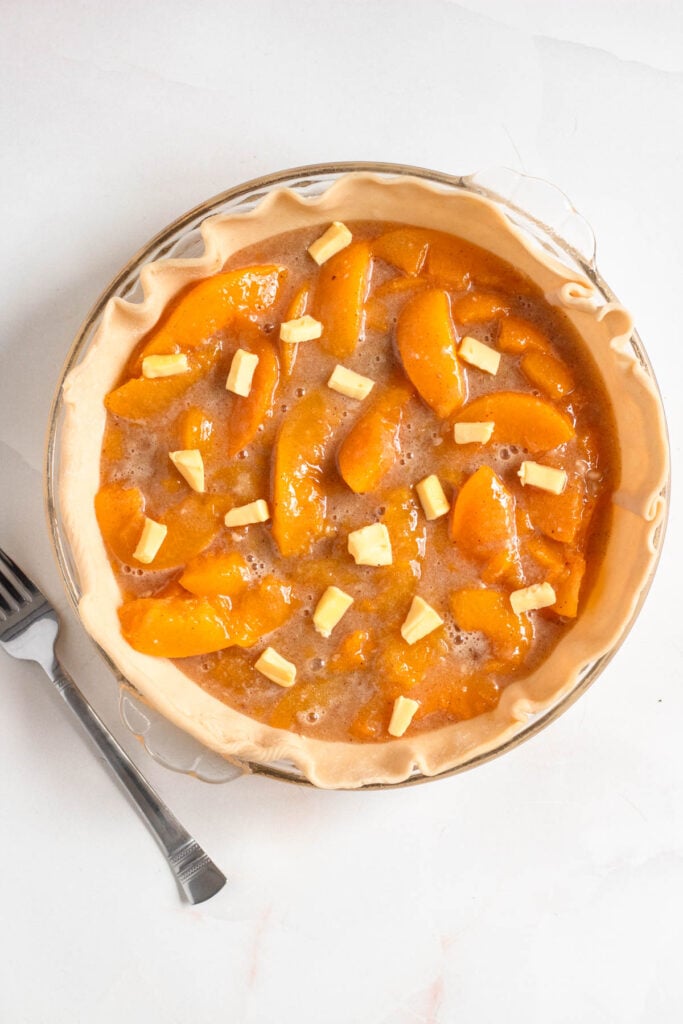
Step Three: Pour the peach filling into the crust and dot with butter.
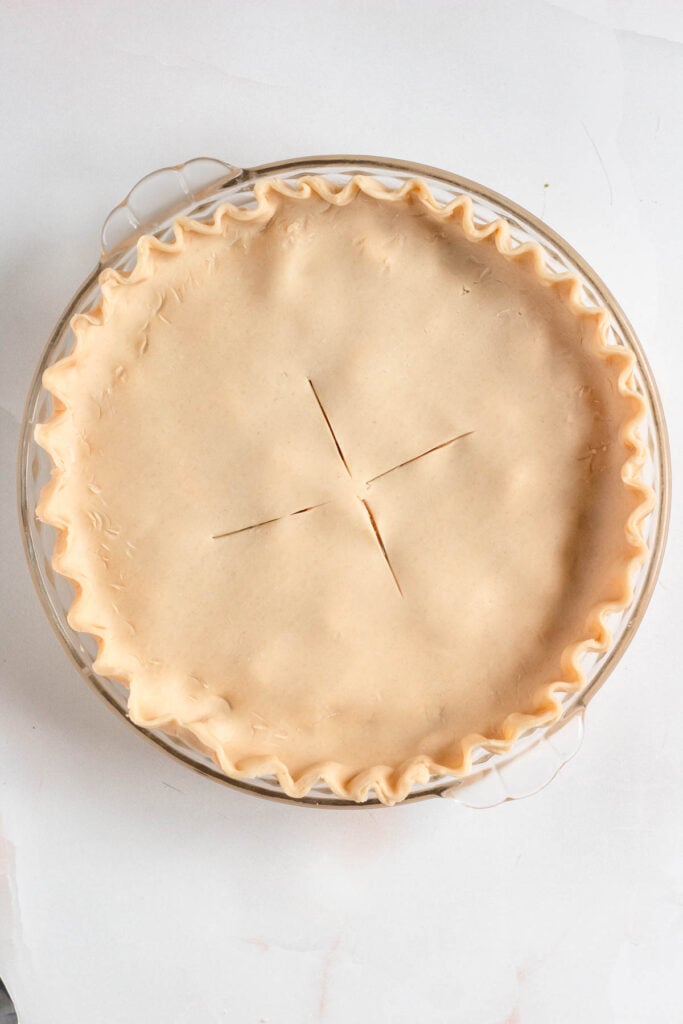
Step Four: Cover with the second crust and cut slits in the top to allow steam to escape.
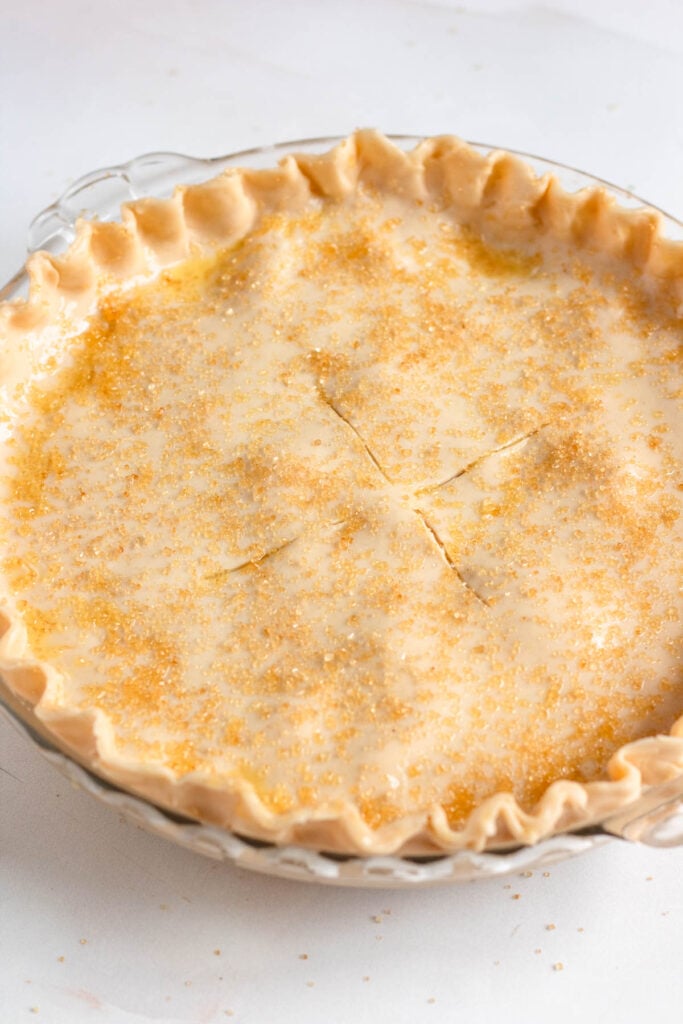
Step Five: Crimp the edges, brush with an egg wash and sprinkle with coarse sugar.
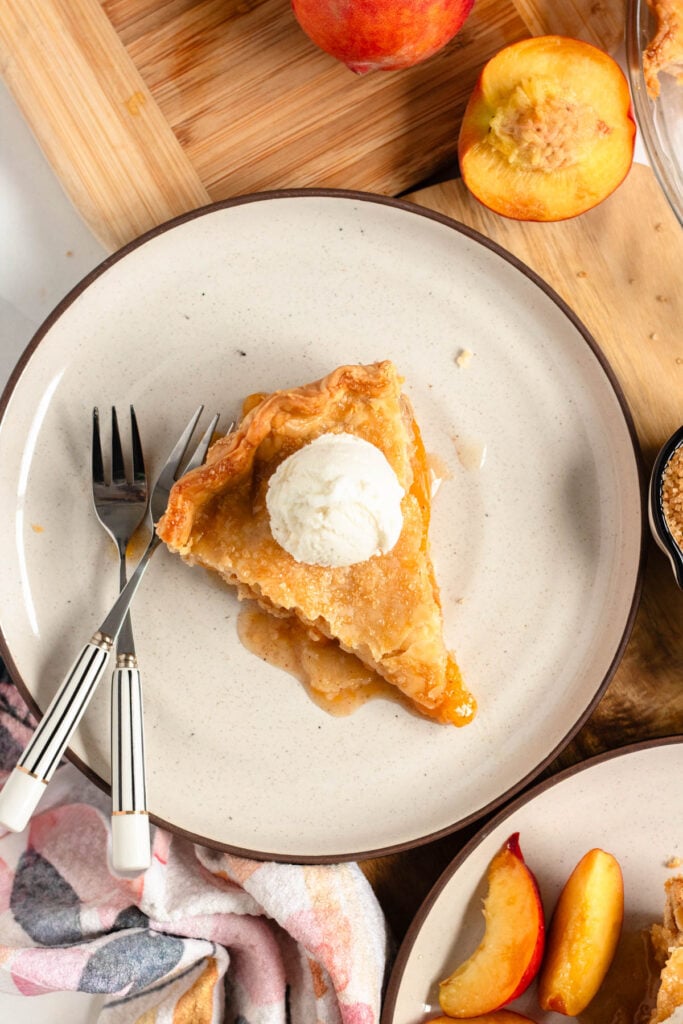
Step Six: Bake until the crust is golden brown and the filling is bubbling. Let the pie cool at least 2 hours before slicing to allow the filling to set.
Expert Tips
- If the crust begins to brown too quickly, cover the top loosely with foil. You can also just cover the edges with foil if they are browning too quickly.
- The first time I tested this recipe, I baked it at 350 the entire time, and the bottom crust turned out raw. That is why I adjusted the recipe to start with a high temperature and move down afterwards… It gives your bottom crust a good start. I also recommend baking in a preheated oven on a lower rack.
- Place a cookie sheet on the rack below the pie for easy clean up… it will catch any pie filling that happens to bubble out!
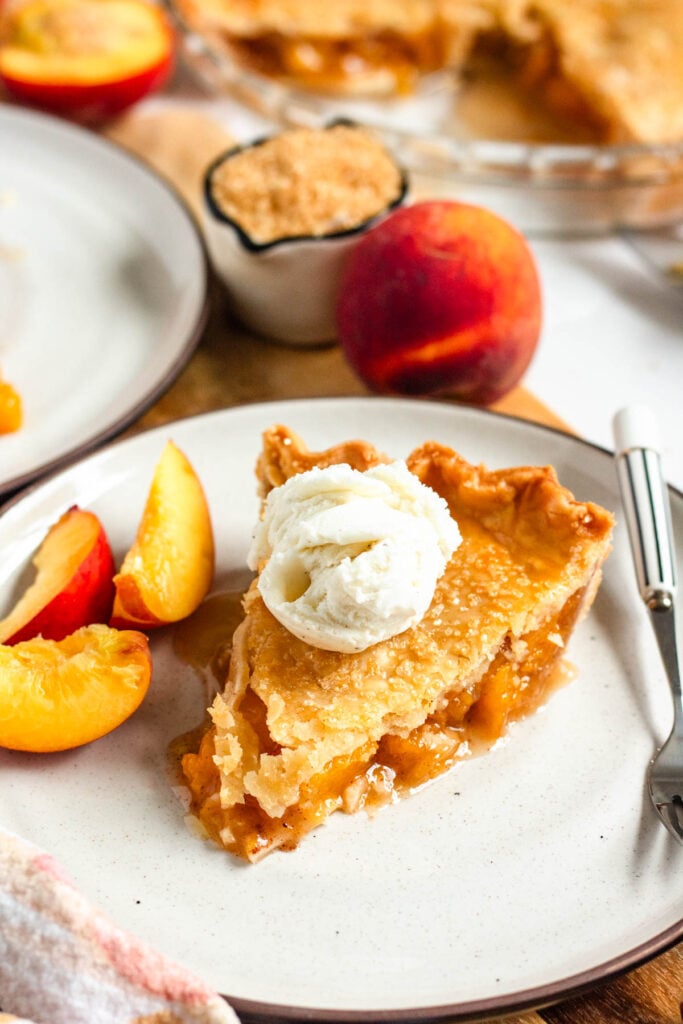
- Serve warm with a scoop of vanilla ice cream or whipped cream!
Recipe FAQs
You can definitely use frozen peaches for this recipe. Make sure you thaw your peaches and drain any excess moisture.
I highly recommend keeping your peach pie in the refrigerator to extend its life. While it can last at room temperature for 2 days, it keeps well in the fridge for about 5 days, as the peaches will release excess juice slower in the fridge. Wherever you store it, make sure it is covered to keep the crust from going stale!
You do not need to blind bake the crust, but it wouldn’t hurt if you did. I found when I baked this pie at 350 degrees my bottom crust was still a bit raw. I recommend starting at a higher temperature and then lowering it, as well as baking on a low rack in your oven.
You can definitely freeze peach pie. You can freeze the entire pie or even better, slice and wrap individual slices for a quick afternoon treat.
Your peach pie is ready when the filling is bubbling and the crust is browned on top. You want a lightly toasted color, not a deep brown color.
Did you enjoy this recipe for Peach Pie with Canned Peaches? Check out these other recipes I chose just for you:
If you tried this Peach Pie with Canned Peaches Recipe or any other recipe on my website, please leave a 🌟 star rating and let me know how it went in the 📝 comments below!

Peach Pie with Canned Peaches
Equipment
- Pie Dish
Ingredients
- 2 15 oz cans sliced peaches, drained
- ¾ cup granulated sugar
- ¼ cup brown sugar
- ½ cup cornstarch
- ½ tsp cinnamon
- ¼ tsp nutmeg
- 1 tbsp lemon juice
- 1 double pie crust, store-bought or homemade
- 1 tbsp unsalted butter, cut into small pieces
- 1 egg, for egg wash
- 1 tbsp coarse sugar, optional, for sprinkling
Instructions
- Preheat the oven to 425 degrees Fahrenheit (190°C). Place a baking sheet on the bottom rack to catch any drips.
- In a large bowl, mix the drained canned peaches, granulated sugar, brown sugar, cornstarch, cinnamon, nutmeg, and lemon juice. Gently toss until the peaches are evenly coated.
- Spray the bottom of a 9-inch pie dish with nonstick spray. Then roll out one pie crust and place it in the bottom of the pie dish. Poke the crust with a fork to allow for some aeration.
- Pour the peach filling into the crust and dot with butter. Cover with the second crust (whole or lattice). Trim and crimp the edges.
- Beat the egg with a splash of water and brush it over the top crust. Sprinkle with coarse sugar if desired.
- Cut slits in the top crust for steam to escape if using a whole top crust.
- Bake for 15 minutes. Then reduce the heat to 350 and continue baking for 45-55 minutes or until the crust is golden brown and the filling is bubbling. If the crust starts browning too quickly, cover the edges with foil.
- Let the pie cool at least 2 hours before slicing to allow the filling to set.
Notes
- Two Cans of Peaches: Any brand of sliced peaches works fine.
- Double pie crust: You can use a premade crust or make your own!
- If the crust begins to brown too quickly, cover the top loosely with foil. You can also just cover the edges with foil if they are browning too quickly.
- The first time I tested this recipe, I baked it at 350 the entire time, and the bottom crust turned out raw. That is why I adjusted the recipe to start with a high temperature and move down afterwards… It gives your bottom crust a good start. I also recommend baking in a preheated oven on a lower rack.
- Place a cookie sheet on the rack below the pie for easy clean up… it will catch any pie filling that happens to bubble out!
- Serve warm with a scoop of vanilla ice cream or whipped cream!