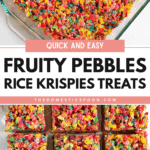
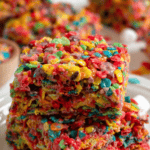
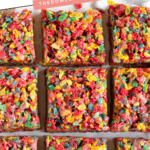
Fruity Pebbles Rice Krispie Treats
Fruity Pebbles Rice Krispie Treats are a fruity, fun twist on a classic, easy dessert. Perfect for bringing a bit of color to your favorite dessert!
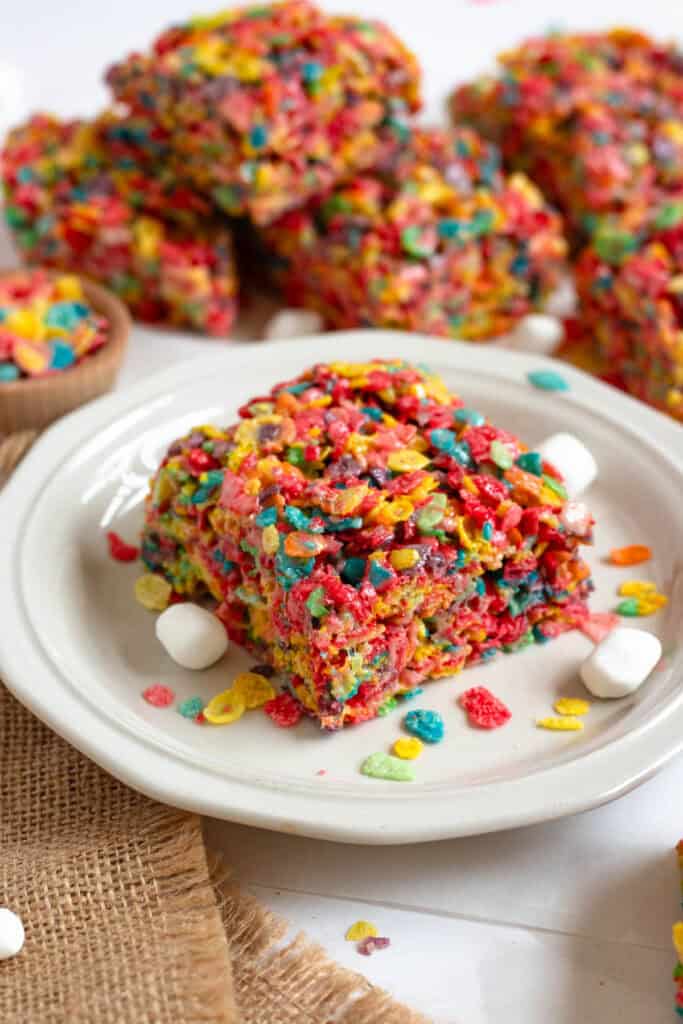
If your inner child could design a dessert, it might look a lot like these Fruity Pebbles Rice Krispie Treats. They are a rainbow‑speckled twist on the nostalgia‑packed bars we all grew up with.
Each bite delivers the familiar marshmallow‑chewy pull of classic rice krispie treats, but with a punch of citrusy cereal crunch that feels like Saturday‑morning cartoons in edible form.
Just like a classic rice krispie treat, these bars are super easy to make and to make your own!
Once you’ve stirred up this colorful batch, keep the cereal creativity rolling with some other crowd‑pleasing riffs: Chocolate Peanut Butter Rice Krispie Treats, Lucky Charms Rice Krispie Treats, or even Caramel Rice Krispie Treats.
Why Make This Recipe
- Fruity Flavor: Who doesn’t love the fruity flavor of Fruity Pebbles? Matched with the sweetness of marshmallows, it’s a dream come true!
- Quick Dessert: Rice krispie treats are notoriously one of the easiest desserts to make! Perfect for any occasion.
- Color: The splash of bright colors that Fruity Pebbles delivers? Color = Fun.
Ingredients to Make Fruity Pebble Rice Krispie Treats
Here is a visual overview of the ingredients in the recipe. Scroll down to the recipe at the bottom for quantities.
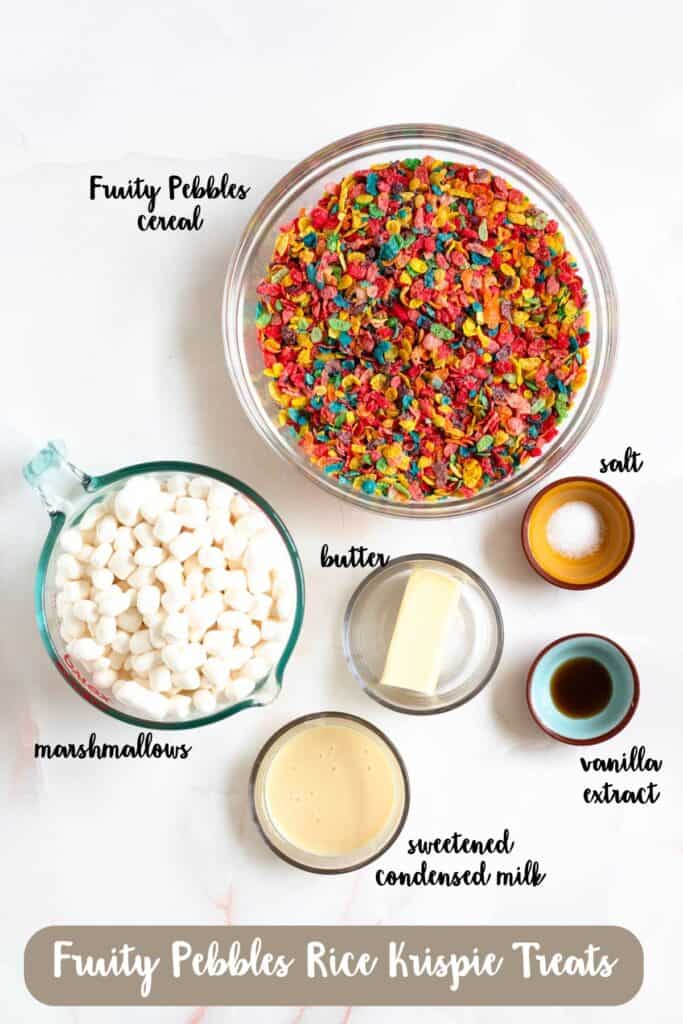
- Fruity Pebbles Cereal: There are also off-brand versions of fruity pebbles, which will work just as well in your dessert.
- Unsalted Butter: I prefer to use unsalted butter so that I can adjust the amount of salt in the recipe according to my own tastes. If you only have salted butter, you may not need the extra salt called for in the recipe.
- Marshmallows: You can use mini marshmallows or jumbo marshmallows, as long as there are 10 oz of them. If using large marshmallows, you may want to cut them down to a smaller size to make the melting process a little smoother. Feel free to add some extra mini marshmallows into the blend later (not melted) so that you can have an unmelted marshmallow in your bites!
- Vanilla Extract: If you left out the vanilla extract, your treats would still hold together nicely. But I like the fact that the vanilla adds a warm tone to the sweetness of this dish.
- Sweetened Condensed Milk: Sweetened condensed milk is not a typical ingredient in Rice Krispie Treats, but I love the texture that it adds. It takes your bars from basic to bakery-quality, making them extra chewy, sweet, and delicious!
Recipe Variations

Rice krispie treats are so versatile so don’t limit yourself. You could make this same recipe with Cocoa Pebbles for a chocolate twist. You could also throw in some white chocolate chips for added sweetness!
Tools
- Large Pot: A heavy-bottomed pot will keep the marshmallows from burning faster.
- Mixing Bowl: If you really want to save some dishes, you can also mix the treats right in the pot (as long as it is removed from the heat first!)
- 9×9 Baking Dish: You could use a 9×13 baking dish but your bars will turn out thinner.
How to make this recipe

Step One: In a large pot add the unsalted butter and marshmallows and stir until melted.

Step Two: Add in the vanilla extract and sweetened condensed milk.

Step Three: Pour the marshmallow mixture over your fruity pebbles cereal.

Step Four: Stir until evenly distributed.

Step Five: Press the mixture into a prepared baking dish to cool.
Expert Tips
- Your mixture will be sticky when you transfer it to your pan. Spraying the tips of your fingers with a bit of non-stick spray can make it easier to pat the mixture into your pan.
- Be gentle when pressing your mixture into your pan! Too much pressure will make for dense bars, rather than light and crispy!
- Be sure and cook your marshmallow mixture over low heat. You do not want to deal with burnt marshmallows in your pan!
Recipes FAQs

There are a few tricks to help keep your bars chewy and not hard. Using the sweetened condensed milk definitely helps achieve a chewy and soft texture. You also want to be sure not to overcook your marshmallow mixture. They are done as soon as they are melted!
Store these Fruity Pebbles Rice Krispie Treats in an airtight container at room temperature and they should stay good for about five days.
Yes, you can! Wrap each bar in plastic wrap and store in a freezer-safe bag or container for up to 2 months. Thaw at room temperature before serving.
Definitely! Have fun with some white chocolate chips, sprinkles or extra marshmallows. Whatever you like!
Did you enjoy this recipe for Fruity Pebbles Rice Krispie Treats? If so, check out these other recipes I’ve selected just for you:
If you tried this Fruity Pebbles Rice Krispie Treats Recipe or any other recipe on my website, please leave a 🌟 star rating and let me know how it went in the 📝 comments below!

Fruity Pebbles Rice Krispie Treats
Equipment
- Large Pot
- Mixing Bowl
- 9×9″ Baking Dish
Ingredients
- 6 cups Fruity Pebbles cereal
- 5 tablespoons unsalted butter
- 10 ounce bag mini, or jumbo marshmallows + an optional ½ cup
- ½ teaspoon vanilla extract
- ½ teaspoon salt
- ¼ cup sweetened condensed milk
Instructions
- Fill a large bowl with 6 cups of Rice Krispies cereal. Set aside.
- Spray a 9×9 baking dish with nonstick spray. Set aside.
- In a large pot add the unsalted butter and stir until melted.
- Add the 10 ounce bag of marshmallows to the pot and continuously stir until they completely melt.
- Add in the vanilla extract, salt, and sweetened condensed milk, stirring everything once again until combined.
- Remove the marshmallow mixture from the heat and pour over the bowl filled with the Rice Krispies cereal. Use a large wooden spoon or rubber spatula to fold the ingredients together until evenly distributed.
- While the mixture is still warm, add the mini marshmallows if desired.
- Transfer the mixture to the prepared baking dish and press into the pan evenly.
- Let the treats sit at room temperature for about an hour before eating.
- Cut and enjoy or store in a ziploc bag or a tightly sealed container for later. Enjoy!
Video
Notes
- Fruity Pebbles Cereal: There are also off-brand versions of fruity pebbles which will work just as well in your dessert.
- Unsalted butter: If you only have salted butter, you may not need the extra salt called for in the recipe.
- Marshmallows: You can use mini marshmallows or jumbo marshmallows, as long as there is 10 oz of them. If using large marshmallows, you may want to cut them down to a smaller size to make the melting process a little smoother. Feel free to add some extra mini marshmallows into the blend later (not melted) so that you can have an unmelted marshmallow in your bites!
- Vanilla extract: If you left out the vanilla extract, your treats would still hold together nicely.
- Your mixture will be sticky when you transfer it to your pan. Spraying the tips of your fingers with a bit of non-stick spray can make it easier to pat the mixture into your pan.
- Be gentle when pressing your mixture into your pan! Too much pressure will make for dense bars, rather than light and crispy!
- Be sure and cook your marshmallow mixture over low heat. You do not want to deal with burnt marshmallows in your pan!