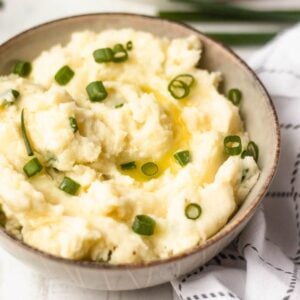
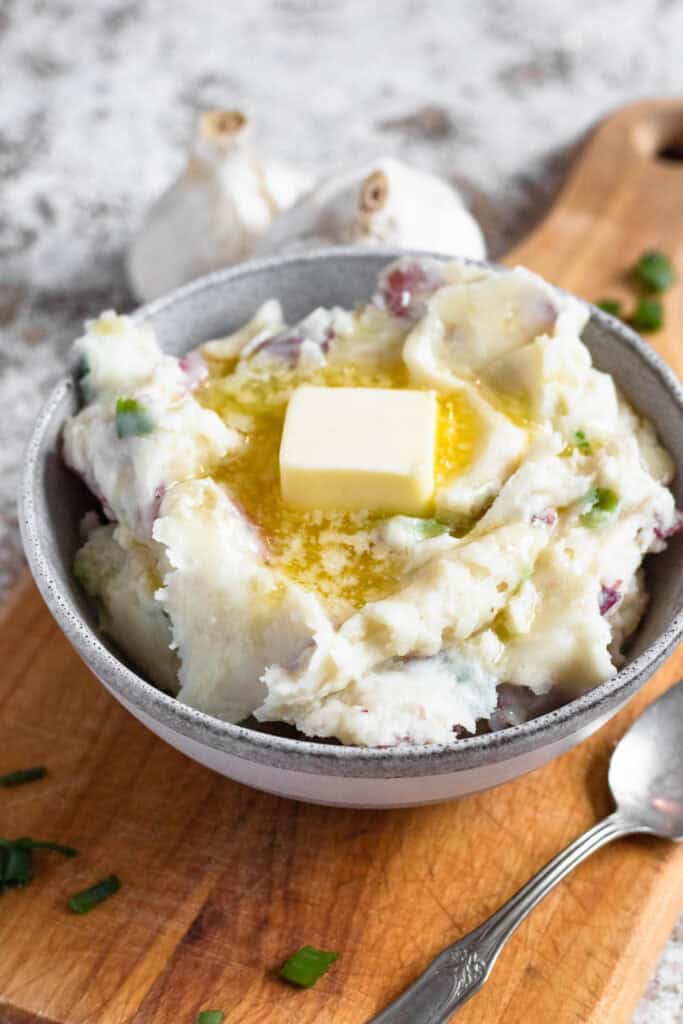
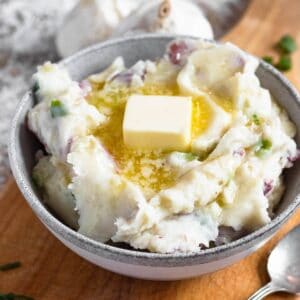
Red Skin Mashed Potatoes
No holiday meal is complete without the perfect, creamy, mashed potatoes. This easy Red Skin Mashed Potatoes recipe is seasoned with garlic, green onions and loads of butter, as well as a secret ingredient to make them nice and creamy. The result is a melt-in-your-mouth delicious side dish that I have spent years perfecting!
With my mashed potatoes, the secret is in how you layer the flavor
I’ve played around with this recipe for years, but I have finally gotten the perfect formula that gives flavor-filled, garlicky and creamy red skin mashed potatoes! If you’re often bored with your mashed potatoes, the problem could be how you’re layering the flavor of the ingredients
- Build flavor BEFORE it hits the potatoes – Most mashed potato recipes simply boil the potatoes, drain + mash, and then dump in some cold milk and butter. We’re doing something different. Instead, we melt the butter and saute some garlic in it. Then we add green onions and milk into the same pan. This infuses the butter AND the milk with the garlic & green onion flavor, and warms it at the same time. This entire combination then gets dumped into the potatoes, ensuring that the infused fat and milk gets spread throughout so that every bite tastes layered, not just garlic sprinkled on top.
- Cream cheese = built in creamy texture – I love a thick mashed potato, so I wanted to figure out how to make an extra creamy texture without having to add a ton of liquid. The secret? Cream cheese. Adding cream cheese stabilizes the texture of the potatoes so they’re harder to mess up, and also adds a slight tang for a more interesting flavor!
- Layered onion flavor – I will never turn down an opportunity to add green onions to a recipe… or onion powder for that matter. My potatoes have two different forms of onion flavoring. Green onion for a fresh, sharp onion flavor. And onion powder for a more complete flavor that gets spread evenly throughout every bite.
Key Ingredients to Make My Red Skin Mashed Potatoes
Here is a visual overview of the ingredients in the recipe. Scroll down to the recipe at the bottom for quantities.

- Redskin Potatoes: Redskin potatoes have just the right amount of starch to create fluffy, delicious mashed potatoes. The tender skin cooks up so nicely you don’t have to peel the potatoes.
- Garlic: This recipe calls for a large amount of garlic. Trust me. It melts perfectly into the potatoes and won’t overwhelm you.
- Green Onions: The green onions add balance and extra flavor to this dish. You can use the green and the white part of the onion.
- Cream Cheese: Cream cheese adds a hint of creaminess to the potatoes and helps create the perfect texture too.
- Milk: Milk is important to helping you reach the best consistency. Whole milk is preferable.
How to Make This Recipe

Step 1: Cover the potatoes in water and boil until the potatoes are fork tender.

Step 2: Melt butter in a pan, then add minced garlic and saute until the garlic is fragrant. Add green onions and saute for another minute.
Step 3: Add the milk, stirring until it’s warm. Then add the milk mixture to the mashed potatoes, alongside your seasonings and cream cheese. Stir until everything melts into the potatoes.
Alexandria’s Top Tips
- Don’t Rush the Potatoes – I know some people love lumpy potatoes, but that is not me. The worst part about making mashed potatoes is when you go to mash them but they won’t break apart because they weren’t ready! Wait until your potatoes are TRULY fork tender (aka falling apart when you stick a fork in them) so that you get smooth and creamy mashed potatoes instead of lumps.
- Don’t Overmash – And please, please don’t use an electric hand mixer to blend the potatoes! Either of these will result in gluey potatoes with an unpleasant texture. Instead, hand-mash and stop just when they are smooth.
- Keep an eye on your garlic – The first time I made this recipe, I got distracted and walked away from the garlic butter while it was cooking. I came back to browned garlic, instead of the desired yellow-gold color. This was not great, and led to a bitter taste throughout the dish. You know your garlic is ready when it is fragrant and golden, NOT a dark brown. If you’ve hit dark brown, start over…. Sorry 🙁
Customizations and Substitutions
You can customize this dish as much as you want. Try adding a few tablespoons of mayonnaise, sour cream, or even cheddar cheese to add to the flavor.
I like using freshly minced garlic as I feel like it adds texture and so much flavor but roasted garlic would also be delicious!
Making The Potatoes Ahead of Time
Freshly-made potatoes are preferable, but it is possible to make your Redskin Mashed Potatoes ahead of time and reheat to serve. They may thicken up as they get cold so you will need to add some liquid when you reheat.
Add a few tablespoons of butter to the top before heating, and then mix the melted butter in once the potatoes are warm. You could also mix in some warm milk to reach the right consistency.
If you are preparing a large meal and want to save your potatoes for just a few hours before serving, put them in a slow cooker on a warm setting. The crock pot will keep them nice and warm and they will be ready to go when it’s time to eat.
Recipe FAQs
Getting the right consistency with potatoes can be a challenge. If your potatoes are too thick, try adding milk, just a quarter-cup at a time and mixing well until it reaches the consistency you would like.
If your potatoes are too thin, you can try cooking them on your stovetop just a little longer to cook off some excess liquid. If you attempt this, do it at a very low temperature. You could also boil and add more potatoes to your mixture.
Small red potatoes would taste great but because of the size you will end up with more skin in your mash. Regular sized potatoes are preferable.
Yes, add salt to the water while the potatoes boil! If you don’t boil the water, it’s hard to get your potatoes to retain salt-flavor later on in the recipe. Just be careful not to add too much salt later in the seasoning step. Taste your potatoes beforehand and add the amount of salt you prefer. It’s tough to fix over-salted food!

Other REcommended Side Dishes
Did you like this Garlic Redskin Mashed Potatoes Recipe? If so, check out these other sides for a crowd I picked out just for you:
If you tried this Red Skin Mashed Potatoes Recipe or any other recipe on my website, please leave a 🌟 star rating and let me know how it went in the 📝 comments below!
Red Skin Mashed Potatoes
Ingredients
- 2 ½ lb redskin potatoes, washed and cut into quarters (skin on)
- 8 tbsp salted butter, cubed
- 4 cloves garlic, minced
- 2 stalks green onions, chopped (both white and green parts)
- ¼ cup milk
- 2 oz cream cheese, cut into cubes
- ½ tsp sea salt, optional
- ½ tsp onion powder
Instructions
- Place the potatoes in a large pot and fill the pot with water. Salt the water, then bring it to a boil, boiling until the 2 ½ lb redskin potatoes are fork tender (about 15 minutes).
- Drain the potatoes, then add them back into the pot. Use a potato masher to mash the potatoes to your desired consistency.
- While the potatoes are cooking, add 8 tbsp salted butter to a pan over medium heat and allow it to melt. Then add the minced 4 cloves garlic and saute until the garlic is fragrant.
- Once the garlic is fragrant, add the 2 stalks green onions and saute for another minute.
- Then add ¼ cup milk, stirring until it is warm.
- Add the milk mixture to the mashed potatoes along with ½ tsp sea salt, ½ tsp onion powder, and 2 oz cream cheese.
- Stir to combine and add more milk according to texture preference. Enjoy!
Video
Notes
- Don’t Rush the Potatoes – I know some people love lumpy potatoes, but that is not me. The worst part about making mashed potatoes is when you go to mash them but they won’t break apart because they weren’t ready! Wait until your potatoes are TRULY fork tender (aka falling apart when you stick a fork in them) so that you get smooth and creamy mashed potatoes instead of lumps.
- Don’t Overmash – And please, please don’t use an electric hand mixer to blend the potatoes! Either of these will result in gluey potatoes with an unpleasant texture. Instead, hand-mash and stop just when they are smooth.
- Keep an eye on your garlic – The first time I made this recipe, I got distracted and walked away from the garlic butter while it was cooking. I came back to browned garlic, instead of the desired yellow-gold color. This was not great, and led to a bitter taste throughout the dish. You know your garlic is ready when it is fragrant and golden, NOT a dark brown. If you’ve hit dark brown, start over…. Sorry 🙁